
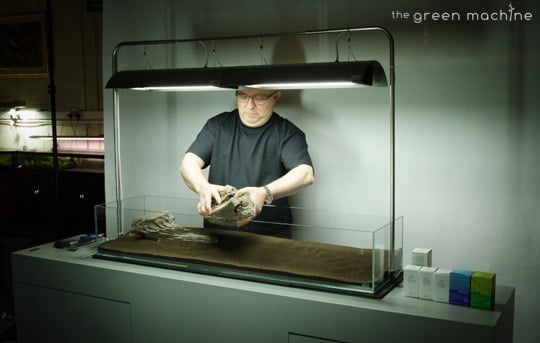
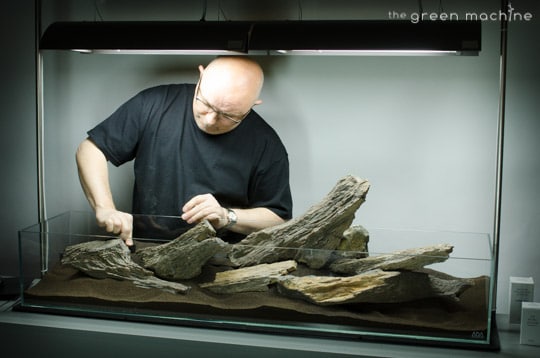
This is one of James’ shallow display aquariums for The Green Machine.
Note James’ pioneering use of terrestrial moss on the fossilised wood above the surface of the water. Full details to follow in the video/journal.
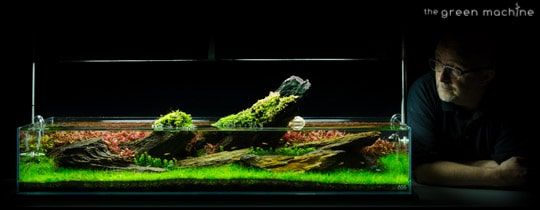
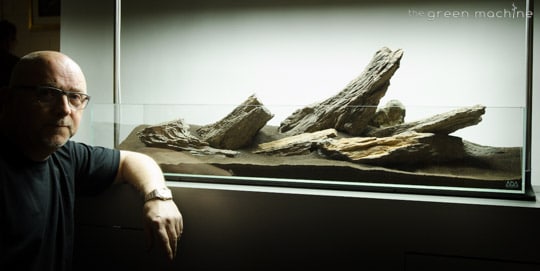
Click the above image to see a larger version of the finished aquascape.
The following video is an interview with James on the subject of this nature aquarium:
Setup Specifications
AQUARIUM & CABINET
SUBSTRATE SYSTEM
HARDSCAPE MATERIALS
FILTRATION SYSTEM
HEATING
LIGHTING
CO2 SYSTEM
FINAL PLANTS USED
FISH & LIVESTOCK
- Boraras brigittae – Mosquito Rasbora x 30
- Otocinclus – Ottos x 10
- Paracheirodon axelrodi – Cardinal tetra x 10
Step by Step…
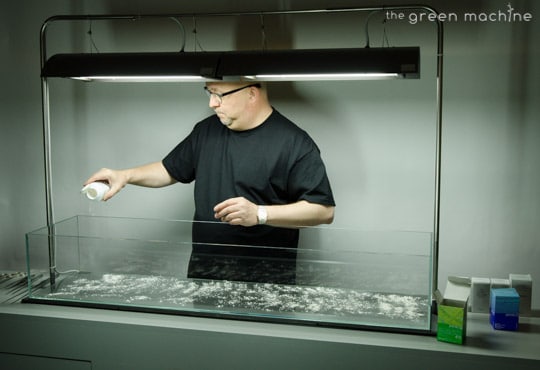
Adding Penac P and Penac W.
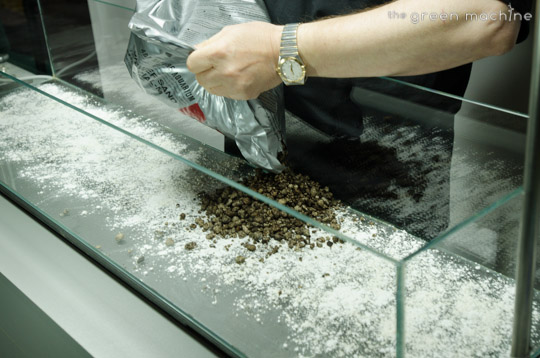
Then ADA Power Sand Special M
Tourmaline BC, ADA Clear Super and Bacter 100 are added.
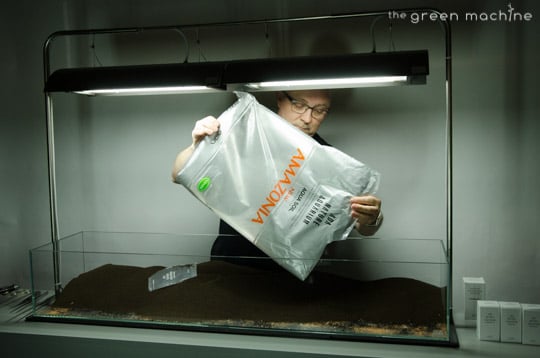
ADA Aqua Soil Amazonia Powder

TGM Fossilised Wood is unique and exceptionally beautiful.
Planting begins. This aquascape consists of three species of true aquatic plants.
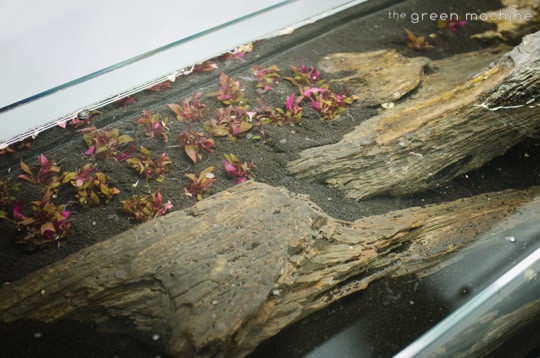
Tropica Alternanthera reineckii ‘Mini’ 1-2-Grow
Tropica Eleocharis sp. Mini 1-2-Grow


Tropica Ammania sp. ‘Bonsai‘ has been added in the mid-ground. Some terrestrial moss has been placed on the emersed rock.
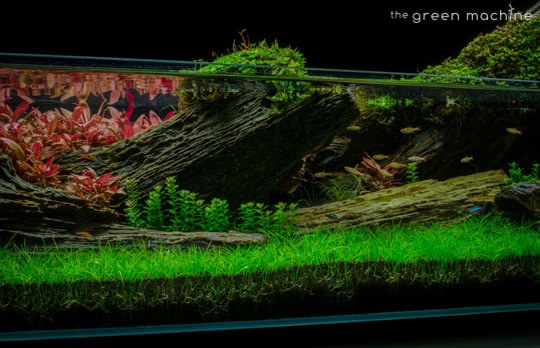
10 Weeks later…
Click the images below for larger versions.
This nature aquarium show the dramatic effect that can be achieved using a minimal number of plant species- three in this case.


We will be updating this page to include a video and video transcript. Call back in future for extra information or watch out for an announcement on our website and social networks.
Like this article? Read more like this…
Video Transcript
Welcome back to The Green Machine, the Nature Aquarium Specialists and the only Nature Aquarium gallery in the UK.
This video documents professional aquascaper and founder of The Green Machine,
James Findley, creating an aquascape in their UK Nature Aquarium Showroom.
As you can see, the results of this aquascape were simply stunning and the piece has become a central work in The Green Machine’s Showroom and store.
James used a 120 x 30 x 20cm aquarium because the shallow dimensions of the aquarium lend themselves so well to experimenting with emersed plant growth, and rock work that extends above the water’s level, adding a whole new dimension to aquascaping.
James finds shallow tanks a pleasure to work with, because they are fun to create, easy to maintain and the unusual dimensions allow for a high degree of originality within the layout.
00.52
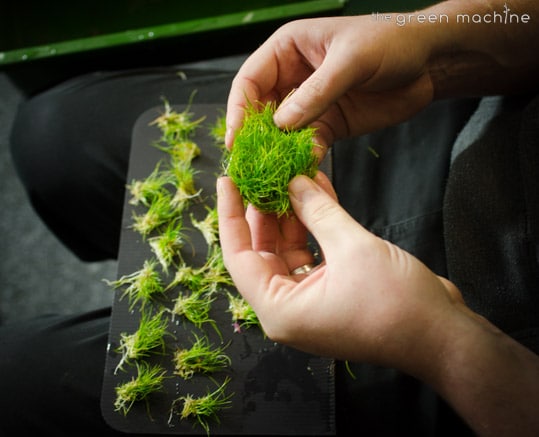
When planting a tank, preparation is key. Ensuring that all your plants are well prepared, your tools are laid out and easily accessible will allow you to derive maximum enjoyment from creating your layout.
The first step is to add the substrate additives. Most of these are added before the substrate,but some can be added afterwards, on top of it. Substrate additives are not essential for a planted tank, but they do create the optimum conditions for beneficial bacterial growth and help to prevent anaetrobic conditions in the aquarium which in turn helps to increase the effects of filtration and create a natural, healthy atmosphere for the plants and fish to thrive in. Because this aquarium is to be a show piece,
James wants it to be perfect and easy to maintain, which is why he using the full range of substrate additives.
Nature aquariums are, after all, a result of the exploration into and desire to create a natural environment for fish. In order to do this, it is vital to have healthy plants within the aquarium as these provide the oxygen needed by the fish. Therefore, the more natural your aquarium environment, the healthier you plants and fish will be. For this reason, Nature Aquarium fish rarely, if ever, need medicating.
02.08
James now adds the Power Sand and spreads it over the aquarium base, making it deeper at the back of the aquarium to begin raising the level of the substrate at the back. Substrate should always be deeper at the back of the aquarium (or, if it is viewable from 360 degrees, in the centre) to allow for the effect of refraction which makes the substrate level appear lower at the back than it really is. In this layout
James wants to create height at the back of the layout so the substrate is banked up quite highly.
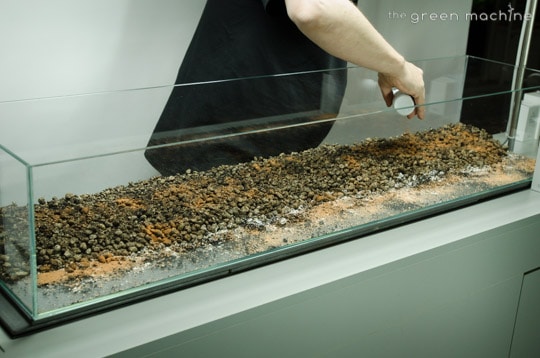
02.41 Some more substrate additives are now placed on top of the Power Sand. For more details on the effects of each particular additive, please visit our website or visit us in store for a personal consultation.
02.54
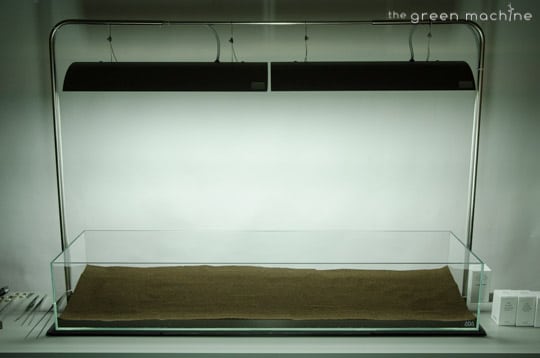
James used two Solar II’s for this aquarium, suspended from a custom built TGM Light Stand which allows the lights to be suspended easily and minimally without detracting from the beauty of the layout.
These lights are exceptional lights, using high quality fluorescent bulbs which are perfect fro shallow tanks and very economical to run. Later in the video, when the layout has grown in properly, the quality of these lights can be seen by the resulting healthy plant growth.
03.40 the substrate is now added.
James used the Powder type, because the smaller granules were ideal for this layout, which aimed to achieve a great sense of scale in a relatively small aquarium. It also has the added benefit of allowing the plant roots to take hold of the substrate and grow more quickly and easily, and is particularly ideal for small plants like
‘Cuba’ and
‘Hairgrass’. Later, you may notice how the smaller granule size of the powder helps to create a sense of scale and looks more pleasing since it is less distracting than the larger granules, particularly when admiring the layout close up.
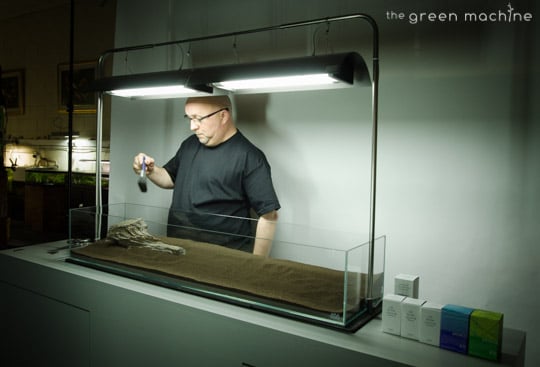
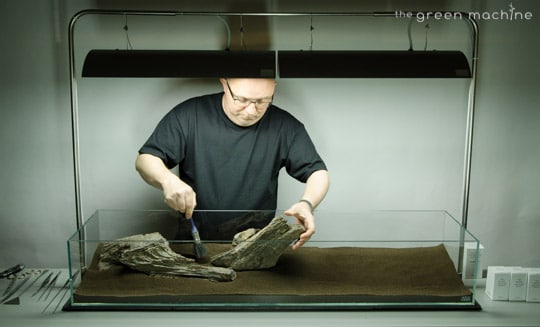
04.10 Now that the substrate layer is complete, the hardscape can be added. This is one of the most exciting and creative stages of a layout because it provides the framework or bones of the work.
Whilst this is, strictly speaking, an Iwagumi layout, meaning a layout in which the sole or dominant hardscape is stone,
James has approached this Iwagumi layout in a very modern, innovative way. Usually in an Iwagumi the Main or Father Stone is added first and is positioned fairly centrally, but in this layout
James inverted the usual rules and started with a much smaller and less dominant stone.
This was because he wanted to create a very graphic, flowing impression – so he started at one end of the aquarium and worked along it to ensure that the linear, graphic effect was optimised. This is another example from
James of how experimenting with breaking the traditionally accepted rules of aquascaping can achieve breath taking results:
James believes that rules are boundaries, and when sticking to boundaries we are effectively stuck in a box which means that we have severely limited creativity. He adds that only by breaking the rules can we break free of the boundaries and get out of the box, which is when he feels the best results can be achieved. Whislt the rules are an excellent place to start learning and experimenting, they are too easy to get caught up in so remember to believe in the courage of your convictions, follow your artistic instincts and experiment freely with your layouts.
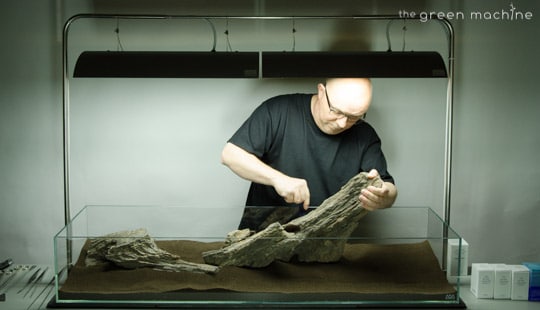
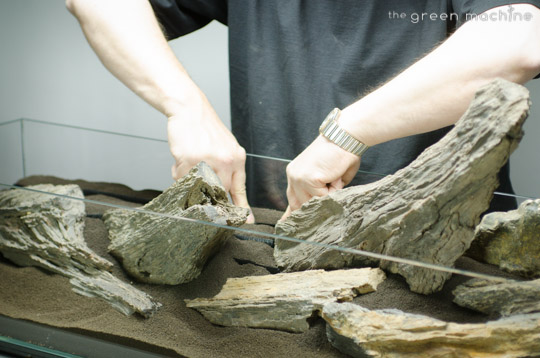
05.44 Here you can see the Main Stone or Father Stone being placed in the aquarium. The position and angle of this stone is highly significant in that it has a huge impact on the overall feel and flow of the layout, so it is worth taking some time over. Due to the weight of these stones,
James positions them very carefully and pushes the substrate in around them.
James used
TGM Fossilised Wood, which he chose for this layout because of its individual texture, linear form, and interesting appearance: the stone looks very like wood, because of its origin, but has the weight and qualities of stone, making it an incredibly interesting, ancient material to work with – this stone is very possibly a plant from the time of the dinosaurs and as such, it adds an almost mystical, wild quality to the layout.
06.32 some more substrate is now poured around the stone to provide further support and bed it into the substrate. When creating a layout construction is vital: it is essential to ensure that the hardscape is secure and stable, so that it does not fall apart. This is another example of how many skills are involved in creating an innovative, experimental aquascape. The substrate is smoothed over with a paint brush before more is added.
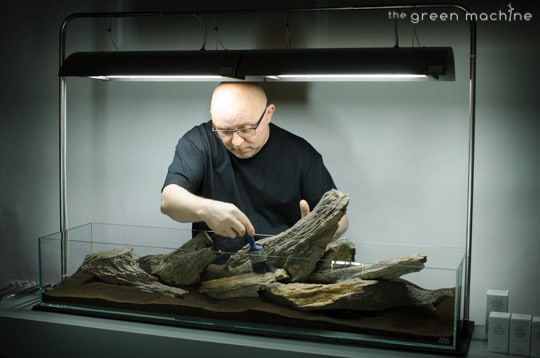
07.28 some more stones have now been added to the layout and you can begin to see the overall impact of the composition coming together: the very graphic linear construction is complimented by the linear texture of the
TGM Fossilised Wood and leads the eye beautifully along the line of the stones. The stones are arranged in such a way as to support the substrate which is banked up behind it.
07.44 you can clearly see the dominance of the Master Stone in this layout, and the way in which it impacts on the overall impression of the aquascape. The stones are now settled into the substrate by pushing them gently in and smoothing the substrate with a paint brush.
It is always advisable, if you have the time, particularly if it is your first aquascape, to lay out the hardscape and leave it for a day or two so that you can come back to it with a fresh mind before you start planting your aquascape.
James is a professional, so does not have this luxury, but as you practice you will become more able to create layouts in an impromptu fashion, but if you are creating a personal aquascape then it is often best to take that approach.
08.09 Some final stones are added to the layout to give a sense of natural complexity and detail. Because the stones in this layout are unusually big for an aquarium of this size, it was particularly important to place them precisely in the layout as there was little room for error. Notice how the Master Stone is protruding significantly from the top of the aquarium, adding that extra dimension to the layout and drawing the eye all the way along it. When this is planted, it will be even more noticeable, albeit in a softer way.
09.56
James now adds some TGM Substrate Supports to the layout, which he developed when working on an earlier aquascape. The Substrate Supports allow the substrate to be banked much higher, so their development opened the world of aquascaping to new and original layout styles, as seen in Tributary and Altitude. The TGM Substrate Supports are simply cut to size and inserted into the substrate in the areas where it looks precarious. Before
James developed these techniques, substrate could easily succumb to the forces of gravity when it was banked up, and simply roll back down, destroying the layout. This is a vital stage of the layout and will ensure that it is stable and secure. For more information on Substrate Supports, visit our website or watch our videos online.
10.41 You may once again notice the fascinating form and texture of the stones:
fossilised wood is wood or other plant material that has been preserved as a fossil over the passage of time, so the original structure of the wood is maintained which is why the stone is so interesting. It is due to this form and texture that TGM
Fossilised Wood is able to create such fascinating and captivating aquascapes.
James spent years searching for this stone, due to its unusual qualities and it is currently his personal favourite – which is why he also used it in Arizona, one of The Green Machine’s huge Nature Aquarium Displays in store. Be careful, because there are imitations of this stone on the market which are often not even suitable for planted tanks.
11.34 More substrate is now poured in to cover any visible parts of the substrate supports and raise the height a little more. You may now notice how the hardscape forms the bones of the layout – it determines the overall shape, direction and qualities that the layout will possess. Remember that when plants are added they soften the impact of the hardscape, so if you want a very dramatic layout bear this in mind and allow for it.
12.00 You can see how highly the substrate is banked up at the back of the aquarium – to just a few centimetres below the top of the tank
12.15 The substrate is then smoothed over with a paint brush, and brushed off the stones.
12.30 Now the aquarium is filled with water.
James clamps a hose pipe onto the side of the tank and places a bowl underneath it to prevent the water flow from disturbing the layout. This ensures that the layout can be filled without any risk – once the plants are grown in layouts are far less delicate, but at this stage they can be a little precarious so proceed with caution at this stage.
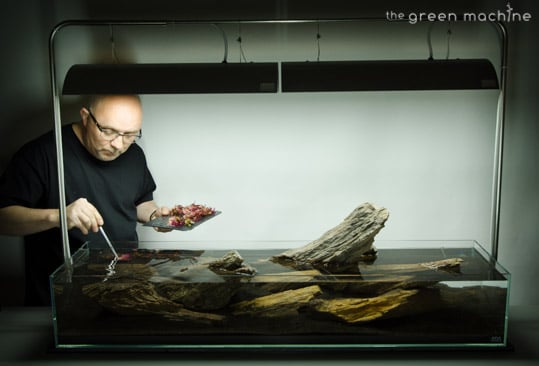
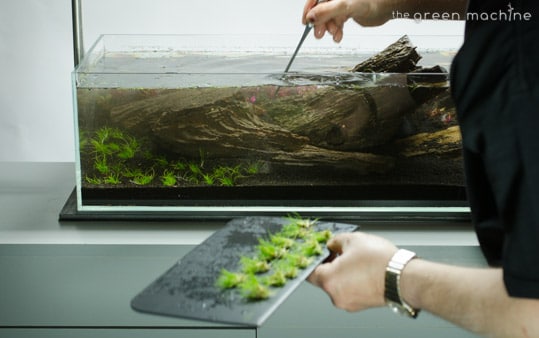
12.55 The planting can now begin. The first plant is Alternathera reinicki, which has deep roots.
James has discovered that it carpets easily although it was not traditionally thought of as a carpeting plant, but in this aquascape he wanted to create a very new and original work: with a carpet of red plants forming a band along the back of the layout, like the rising or setting sun – which is why the work is entitled ‘Crimson Sky’. This was another pioneering technique from
James, which was a little controversial with the TGM team when he first suggested it, but which has undoubtedly created a stunning aquascape – quite easily one of his best yet.
13.18 Elecharis sp Mini is now added to create the front layer or band of this graphic-inspired layout. this is a dwarf harigrass and the bright green colour was chosen to contrast with the innovative red band at the rear of the layout, and the red hues of the
TGM Fossilised Wood. The plants are placed into the substrate in the rough shape of the number 5 on a dice. For more information on working with carpeting plants and grasses – read the article in the free aquascaping library on the TGM website. The powder type substrate is very helpful when planting small plants like this
14.00 the third and final aquatic plant to be added to this layout is Ammania sp bonsai. This is placed between the stones to compliment and reinforce their lines. It is a small green plant that grows vertically. Notice that only three species of aquatic plant were used in this layout – helping to create the very graphic, linear dramatic effect that
James set out to achieve.
14.27 A good quality pair of aquascaping pinsettes is essential for precision planting.
14.39 A further technique
James invented for this layout was the use of terrestrial moss on the protruding rock work.
James was aware that the current aquatic mosses available were not suitable to achieve the effect he wanted, because they would dry out and die. So he began experimenting with mosses and developed TGM Terrestrial Moss, which he used in this layout to great effect. The moss contains a mixture of several plants, which adds intricacy and detail to the layout and since it occurs naturally in environments like this, it is perfectly suited for this use and will not dry out. The moss is simply laid on the stones in the desired position and moistened to cement it in place. As you will see later, this moss worked exceptionally well and since it has never been done before it not only added a sense of age to the layout but also gave it an incredibly individual, innovative and creative appearance.
James is well known for experimenting, innovating and pushing the traditional boundaries by developing new techniques, and this layout clearly continues that trend.
15.46 The aquarium is then filled completely with water – when working on a layout it is always advisable not to completely fill the tank, since disturbances will easily lead to spillages, so this is left until the end
15.55: Ten weeks later the plants have grown in and are thriving. This is a testament to the quality of the products and plants used, and the skills of
James and the TGM Maintenance Team.
Rasbora and cardinal tetra have been added to bring the layout alive. Small fish were chosen to maintain and emphasise the sense of scale. The red stripe in the cardinal tetra compliments the unusual and pioneering use of red plants in the layout.
As we move out from the aquarium we begin to see the graphic linear layout becoming apparent, and notice how the contrast of the greens and reds emphasise that – effectively highlighting each band, or level within the layout. Red and green are directly opposite each other on the Colour Wheel, so they are perfectly contrasting colours.
You may notice how well the TGM Terrestial Moss has grown in and the way in which the natural sense of age it commands compliments the ancient
Fossilised Wood.
16.54? Now we can see how the unusual dimensions of this aquarium lend themselves to innovative aquascaping: the emersed stone work commands attention and adds a whole new element to the aquarium.
We can also see how breaking the traditional rules of an Iwagumi layout has led to a simply stunning result: highly individual, unusual and original,
16.59: the vertical lines of the Ammania bonsai draw the eye upwards, complimenting the horizontal lines of the layout and the texture of the stone work, but in a delicate and subtle way. Notice how the fish behave entirely naturally because they are in an environment that has been created to provide them with their natural habitat
17.25 Here you can see the exciting and beautiful texture of the
Fossilised wood, and the way in which the red hues in it compliment and enhance the bright green Hairgrass in the foreground.
17.55 now the layout is complete its true impact can be experienced. The layout draws the eye right across the aquarium in a horizontal line, and the bands of red and green plants enhance this effect. But the linear angle of the Main Stone then takes the eye neatly upwards to appreciate the terrestrial moss. The contrast of this angle with the horizontal line creates a dramatic and stunning effect, with the bright peak of the Main Stone dominating the layout and complimenting its strong colours.
When
James set out to create this aquascape he envisaged a graphic, linear layout that experimented with emersed elements and made exciting and innovative use of red plants to enhance the effects. In reality, this is one of the most stunning aquascapes ever exhibited in The Green Machine and it is quite literally breath taking when seen in the flesh.
18.40 The glassware has now been added to this layout so you can see exactly what it would look like in your home or office. As you can see, the glassware is hardly noticeable and for that reason it is well worth investing in some good quality pieces to ensure that your aquascapes can be enjoyed entirely, without distractions from ugly plastic components
18.56 The flow of the water adds an extra element of natural movement to the layout, and creates a perfect environment for fish to enjoy.
19.17 From this lower angle, the dramatic impact of the layout can be truly admired and the intricacy of the light and dark areas created by the stone work can be seen.
This is effectively an extremely simple layout: with graphic lines, and only three aquatic plants…..but the results are stunning.
Interestingly, this layout does not fit into any of the traditional layout types….there were three layout types: the Island Layout, the Triangular Layout and the U-shape Layout. In this aquascape,
James has created a new layout style: the Linear Layout.
James believes that the true fun and excitement of aquascaping are in innovation, breaking the traditional rules and pushing boundaries….and in this layout he has yet again shown that sometimes the most breath taking results can be achieved by breaking the rules.
For more videos, articles, tips, tricks and inspiration, and for all your aquascaping needs, visit The Green Machine’s website or Nature Aquarium showroom.


