
This is a quick aquascape journal by James Findley for a Wabi Kusa using a TGM Substrate Ball. There is a full documentary video of this coming soon, but in the mean time have a quick look at this for some inspiration!
1. Preparing your TGM Substrate Ball
James used a TGM Substrate Ball which he had pre-prepared for planting. The Substrate Balls come dry and need to be prepared. This will be deailed in the video, and is a very simple process:
– Place a thin layer of your moss of choice over the entire Substrate Ball when it is still dry.
– Tie it tightly with ADA Riccia Line.
– Then immediately place it in a clear, waterproof, plastic bag with an inch or two of water in it
– Place the bag in natural sunlight and leave for 2 or 3 days until the Substrate Ball takes on the moisture and become workable.
Once this has happened it is ready for planting.
2. Preparing your Plant Glass
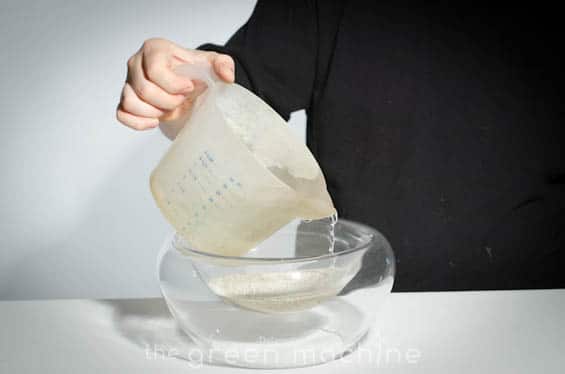
Pour some sand or gravel of your choice into the plant glass. Make sure that the sand/gravel is suitable for aquascaping. This will act as a base for your Wabi Kusa. There are a wide variety of Plant Glasses available – here James used a Plant Glass Oasis.

3. Planting your Wabi Kusa
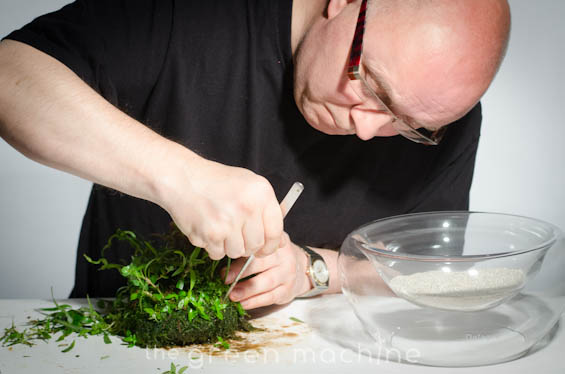
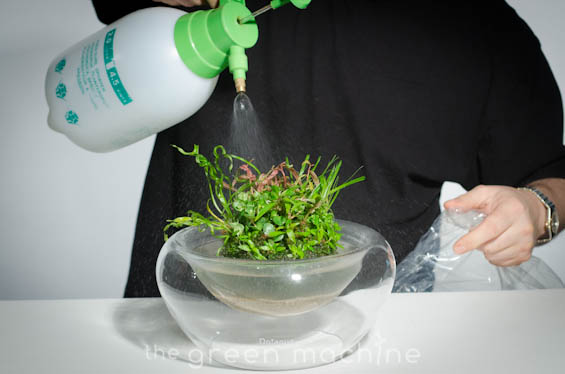
Remove your Substrate Ball from the bag and, with a pair of pinsettes, place holes in the Substrate Ball where you want to put the plants in. Then gently put the stems into the holes. When planting, mist the plants every 5-10 minutes to prevent them from drying out.

Next, place about 2.5cm of water in the Plant Glass.
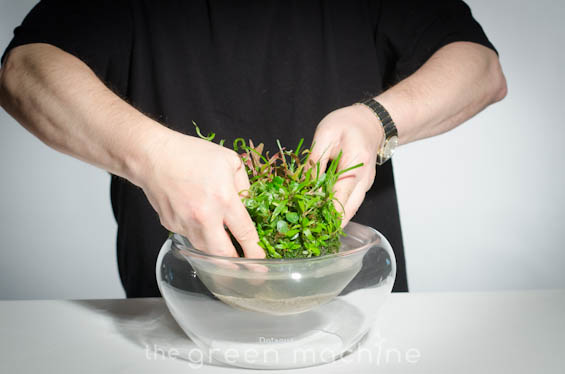
Then carefully place the planted Substrate Ball into the Plant Glass so that it is gently resting on the sand or gravel (below)
Mist the planted Substrate Ball with a good quality foliar fertiliser (diluted in accordance with the instructions). Do!aqua be Bright is specifically designed for use with Wabi Kusa (below)
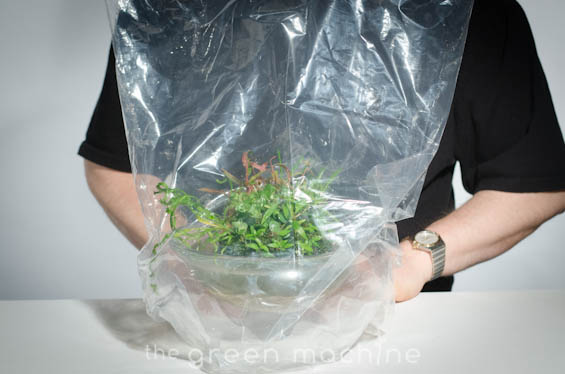
Next, cover the Plant Glass with cling film or a clear plastic bag so that the plants are in almost 100% humidity. This keeps the moisture inside the Plant Glass. Over the following 2-3 weeks, gradually reduce the moisture levels by placing holes in the plastic so that after 3 weeks (or 4 weeks in doubt) the plants are at room temperature. Then the plastic can be removed. This must be done to acclimatise the plants gradually to emersed growth because they have not yet developed root systems and cannot take up moisture properly through the roots until they are established, but if they are not kept moist they will lose water from their leaves and die quite quickly. Once the plants are acclimatised this is no longer an issue but the plants should be misted at least once a day (preferably 2-3 times a day) and fertilised regularly with a good foliar fertiliser like Do!aqua be Bright.
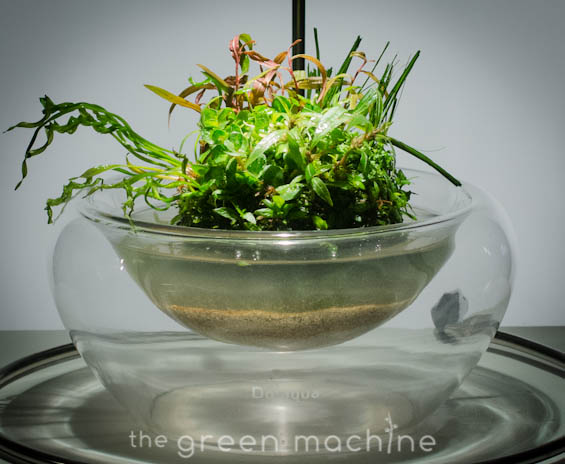
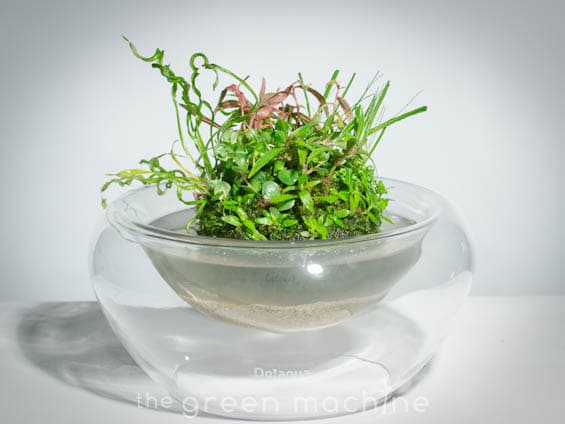
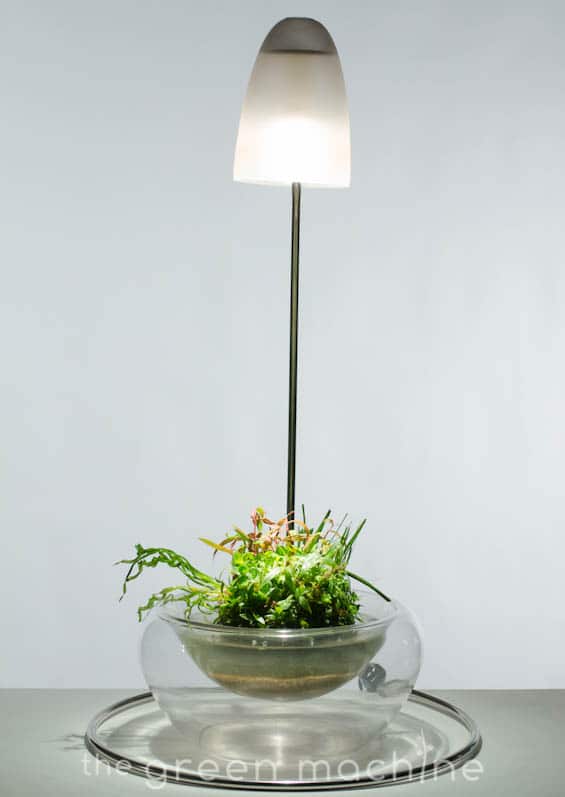
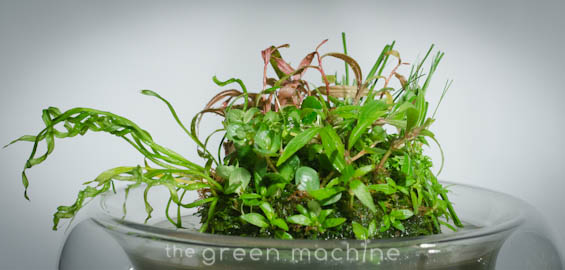
The images below show the completed Wabi Kusa, although the plants are not yet established, and will look even better in a few weeks when they have grown in.

More Wabi Kusa content is coming soon….
Sign up to our YouTube Channel, newsletter and facebook page for all the latest updates
Read our article on Wabi Kusa here.
View another Wabi Kusa aquascape Journal: Wabi-Kusa Cube 1520 by James Findley