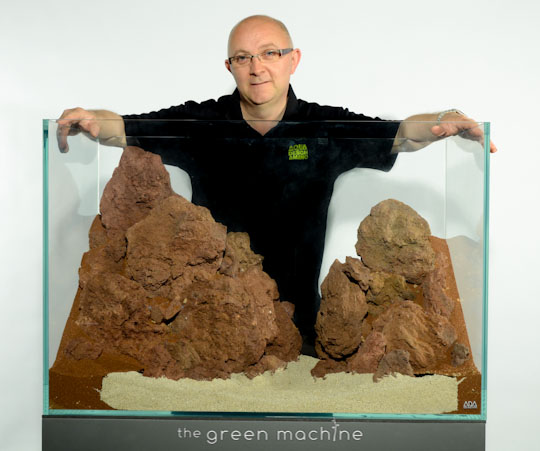
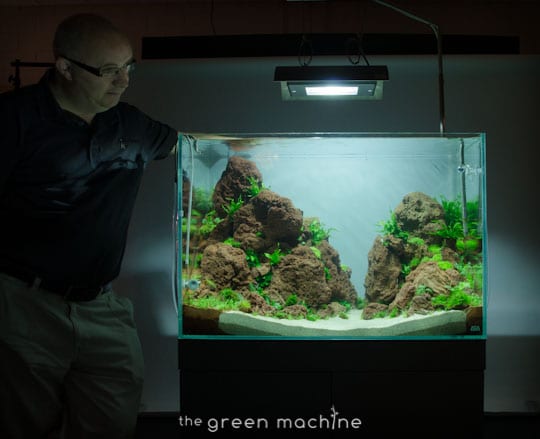
James tries his hand at this new interesting format – an ADA Cube Garden 90-H (W90×D45×H60 cm) tall aquarium – after recently exploring the shallow aquarium format with his famous ‘Tributary’ aquascape layout in an ADA Cube Garden 120-F (W120×D30×H20 cm).
This tutorial article will lead you step-by-step through the creation of this truw Nature Aquarium. Over 70 photos of the whole process are included here along with a documentary video which our film crew shot throughout the process.
Watch the making of video here or skip past for the photo journal…
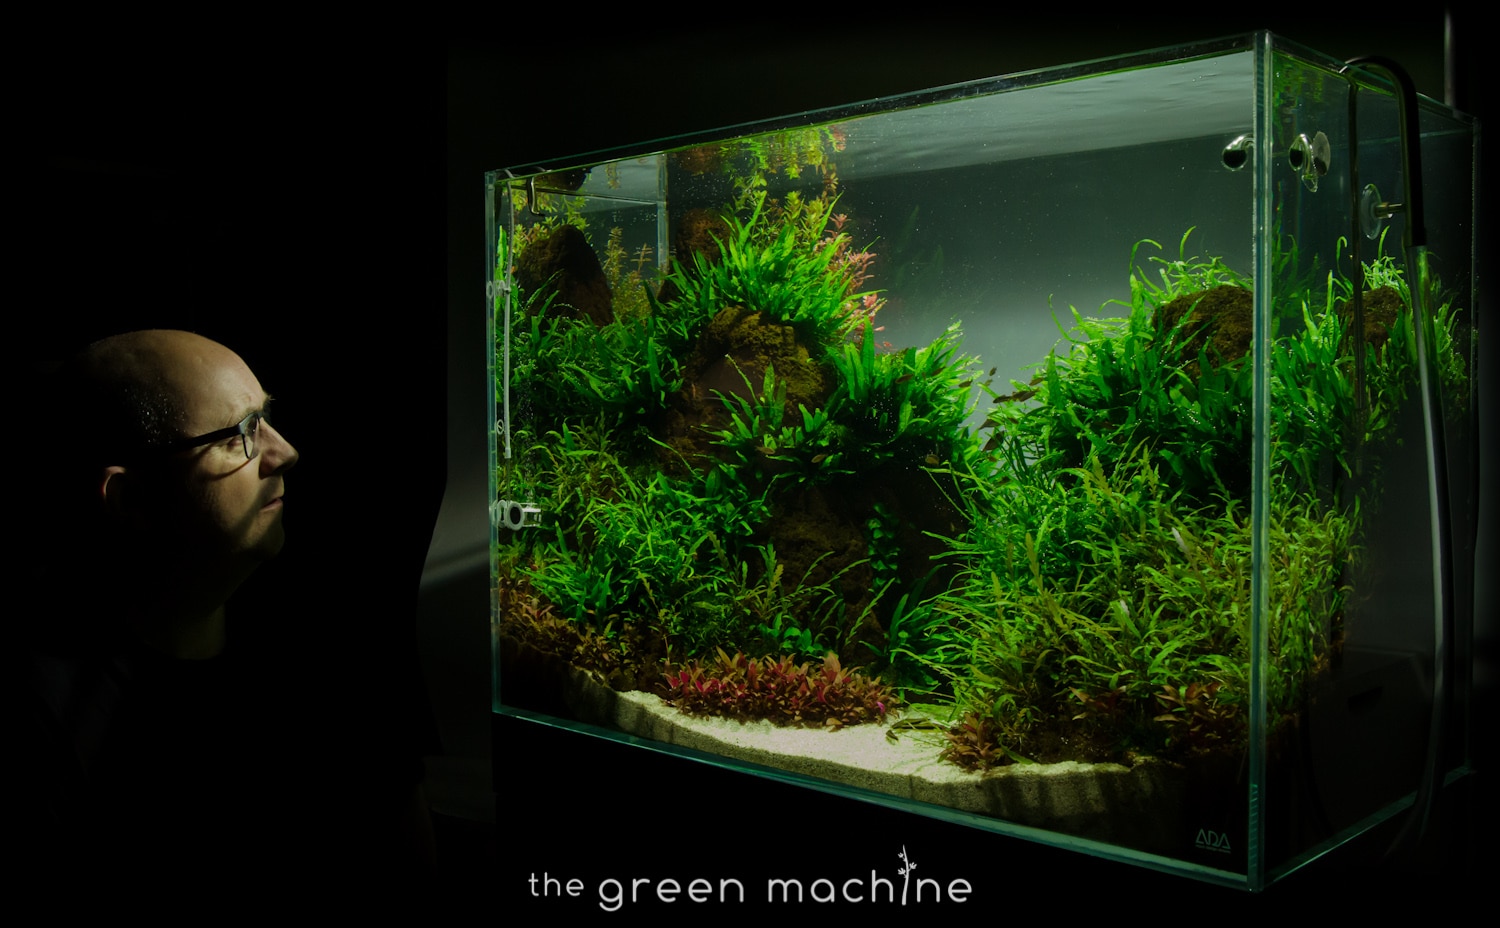
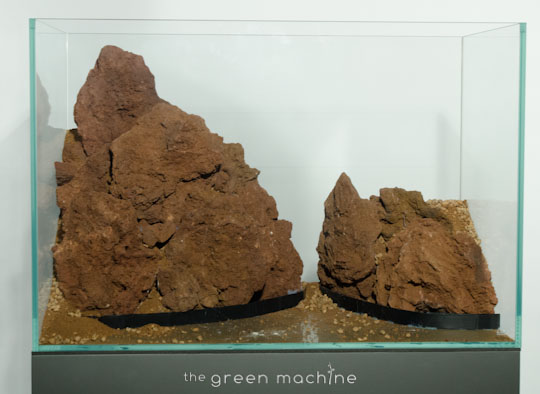
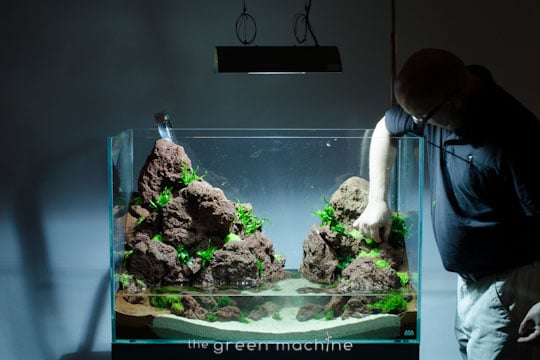
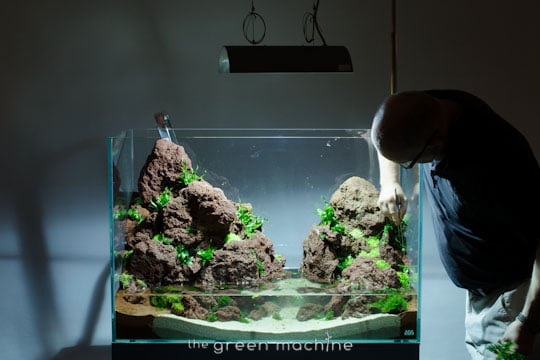
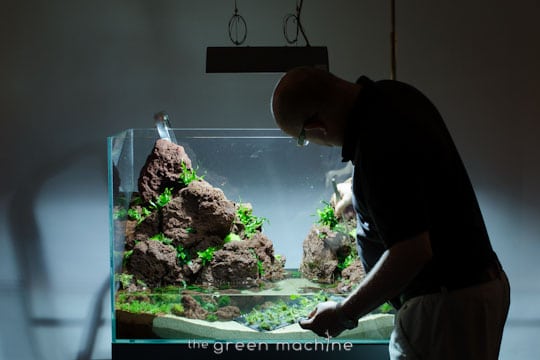
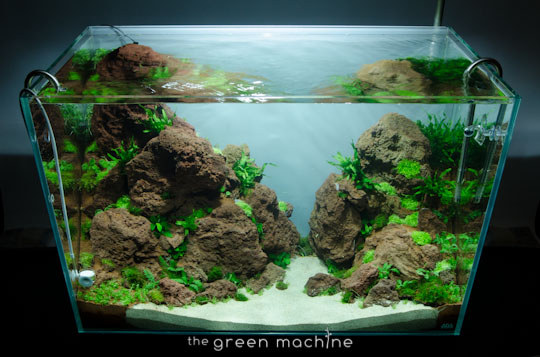
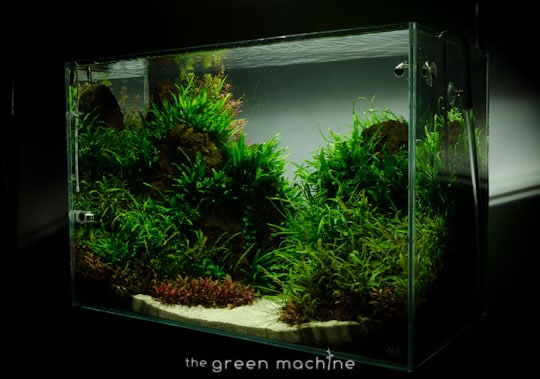
Here is the finished piece at 9 months old… read on to see the path it took to get to this stage.

Setup Specifications
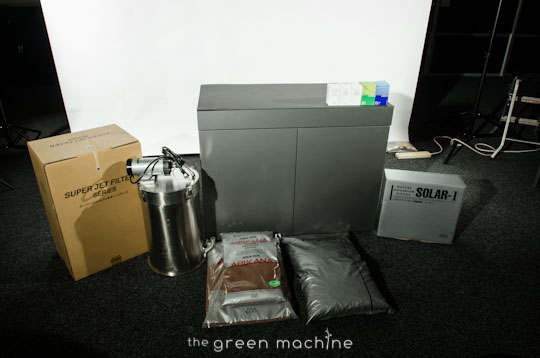
AQUARIUM & CABINET
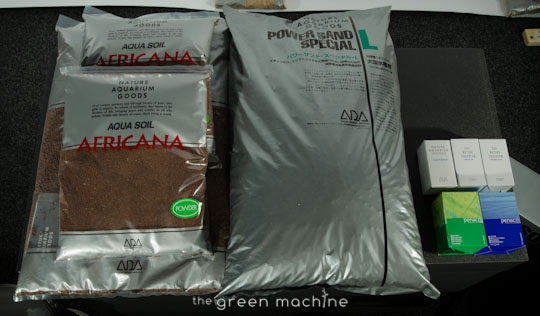
SUBSTRATE SYSTEM
- ADA Power Sand Special L mixed with ADA Aquasoil Africana Granules 9ltr
- ADA Aquasoil Africana Powder 9ltr
- ADA Tourmaline BC
- ADA Clear Super
- ADA Bacter 100
- ADA Penac P
- ADA Penac W
HARDSCAPE MATERIALS
FILTRATION SYSTEM
- ADA Super Jet Filter
- ADA Metal Jet Pipe
- ADA Metal Jet Pipe V-2 Inflow
- ADA Metal Power Pipe Outflow
- ADA Bio Rio Filter Media
HEATING
- Inline heater
LIGHTING
CO2 SYSTEM
FINAL PLANTS USED
- Alternanthera reineckii ‘Mini’
- Hygrophila pinnatifida
- Vesicularia dubyana ‘Christmas’ Moss
- Anubias barteri var. nana ‘Petite’
- Microsorum mini/petite
- Microsorum pteropus ‘Trident’
- Rotala rotundifolia
- Rotala sp.’green’
- Rotala Macandra
FISH & LIVESTOCK
- Sphaerichthys vaillanti – Vaillant’s Chocolate Gourami x 7
- Crossocheilus siamensis – Siamese Flying Fox / Siamese Algae Eater – x 6
- Danio margaritatus – Galaxy Rasbora / Celestial Pearl Danio / Microrasbora sp. ‘Galaxy’ – x 30-40
- Caridina sp. – Crystal red shrimp x 30
Step by Step…
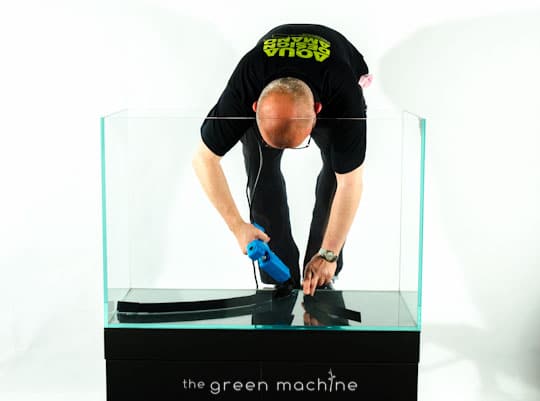
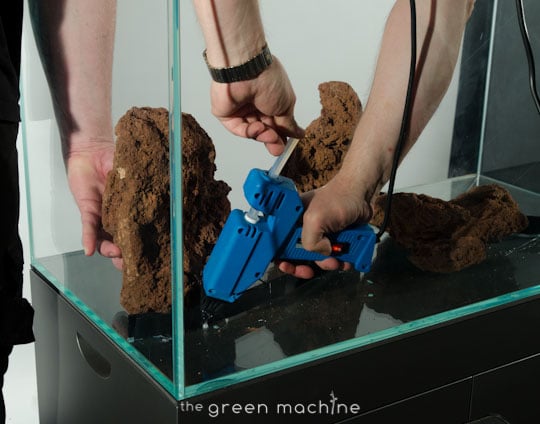
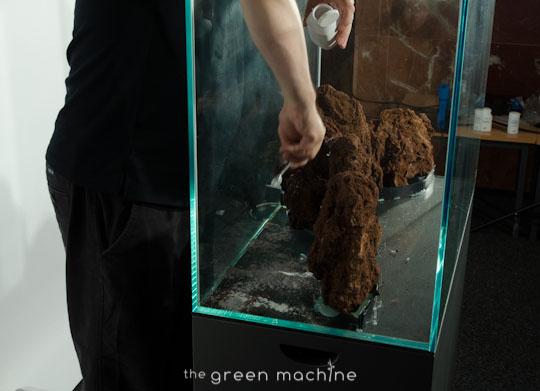
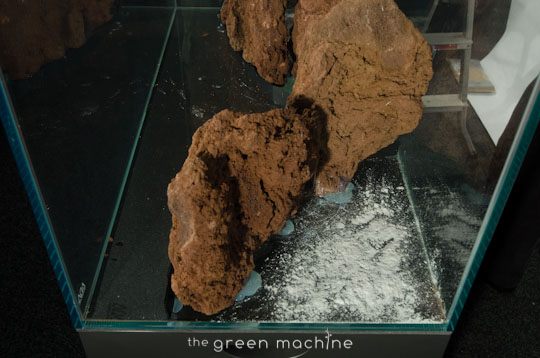
TGM Substrate Supports are scored to achieve a perfect curve. These are used to separate the areas where the sand and substrate will be. For this aquascape, they needed to be glued in so that they would take the weight caused by the height of the banked up substrate.


Like this article? Read more like this…
- Spontaneity Aquascape Planted Tank
- Continuity Shallow Nature Aquarium
- ‘Fallen Tree’ Aquascape by James Findley
- ‘Natures Chaos’ Aquascape by James Findley
- ‘Riverbank’ Aquascape by James Findley
- The Power of ADA – A 60-P Nature Aquarium
- The Power of ADA – An ADA Nature Aquarium
- The Power of ADA – A Do!aqua Nature Aquarium
- + Many more! – Explore our website!
Video Transcript:
0.00
Welcome back to The Green Machine, the Nature Aquarium specialists.
This video documents professional aquascaper, and founder of The Green Machine, James Findley, aquascaping a 90 x 45 x 60 centimetre aquarium, which he entitled ‘Altitude’.
00.17
James chose this size of aquarium because, after creating ‘Tributary’ and experimenting with shallow aquariums, he wanted a new challenge. So he opted for an aquarium 60 centimetres tall, and set about developing the aquascaping techniques that would allow him to achieve his vision: a tall canyon-like landscape, reminiscent of a sheer, unforgiving cliff face, to take full advantage of the vertical space within the aquarium, but without using any wood.
00.46
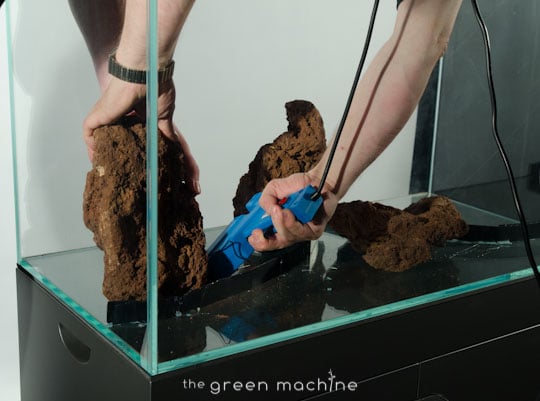
In order to do this James had to get creative. As you can see here, the first thing he did was to use some TGM Substrate Supports which he scored in order to achieve a perfect curve. These were glued in to place using a hot glue gun. Normally they can just be taped down, but because of the weight and design of this layout they needed to be firmly secured. These supports separate the substrate area from the sand area. For more information on this technique, see some of our earlier videos.
01.17
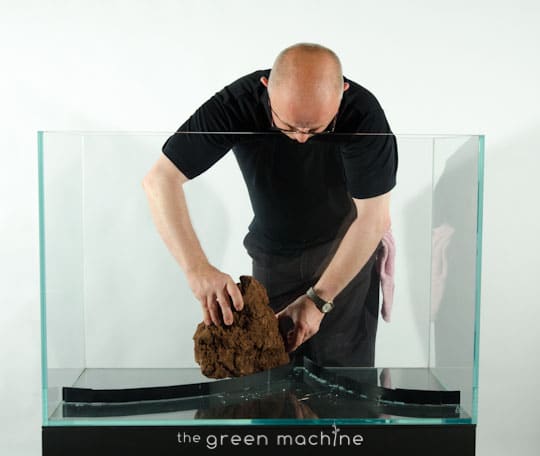
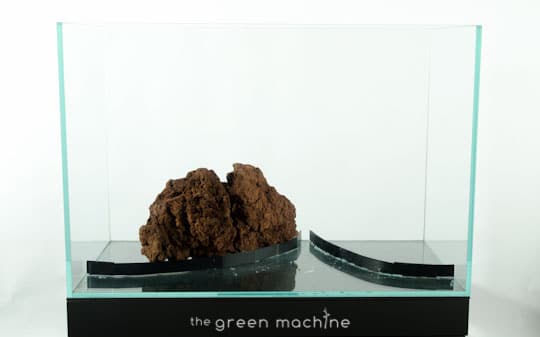
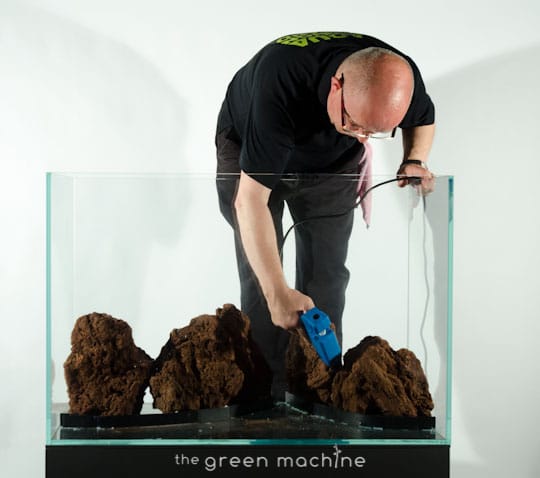
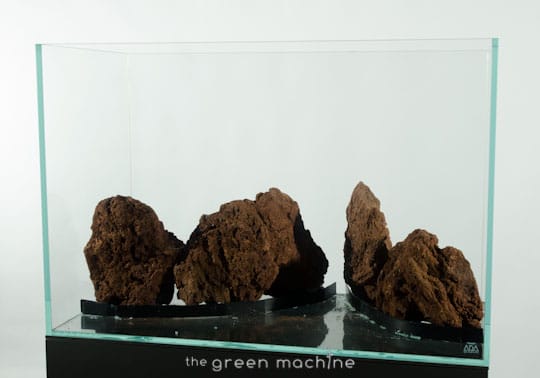
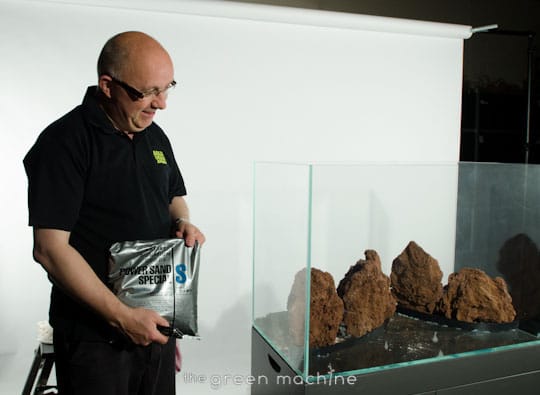
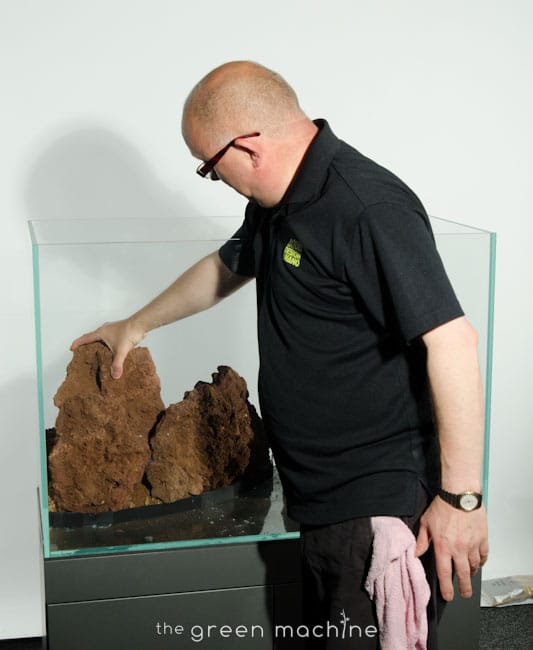
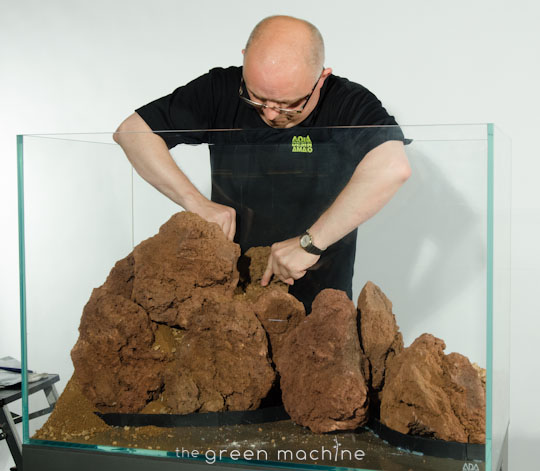
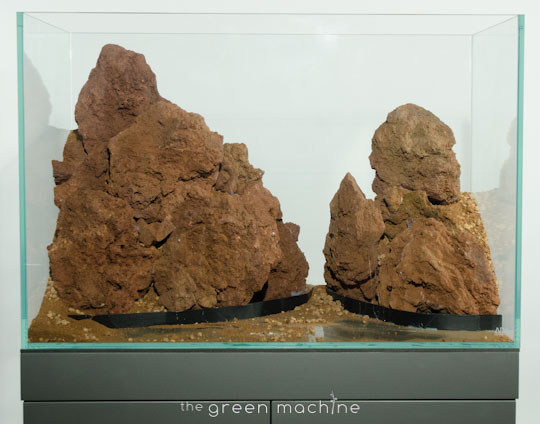
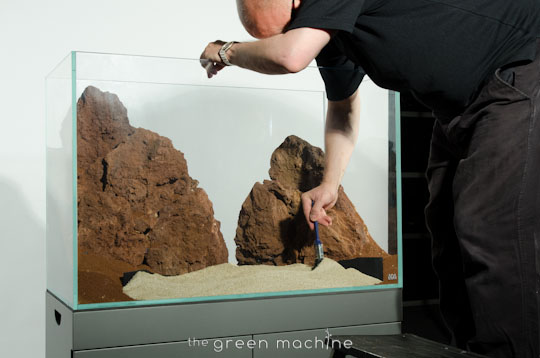
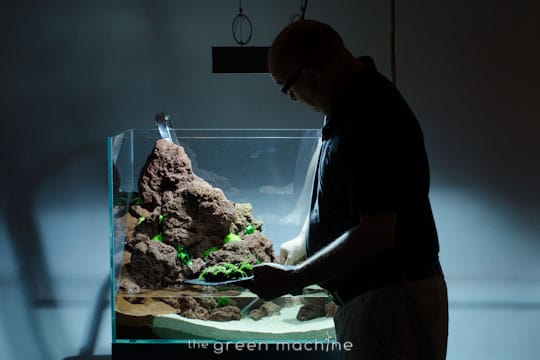
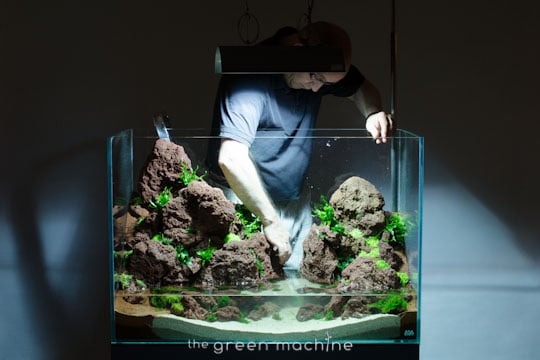
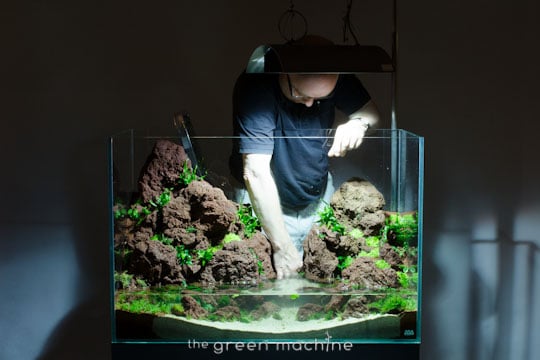
The first layer of stones is now added. James did a dry run of the layout to select stones that would fit together well, a bit like a jigsaw, before placing them in the aquarium. He used large stones, so that the finished layout would look like one solid stone wall.
01.30
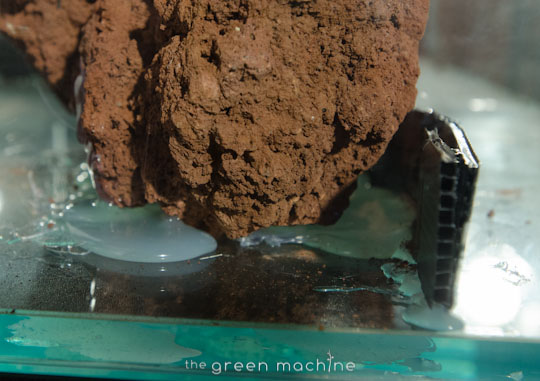
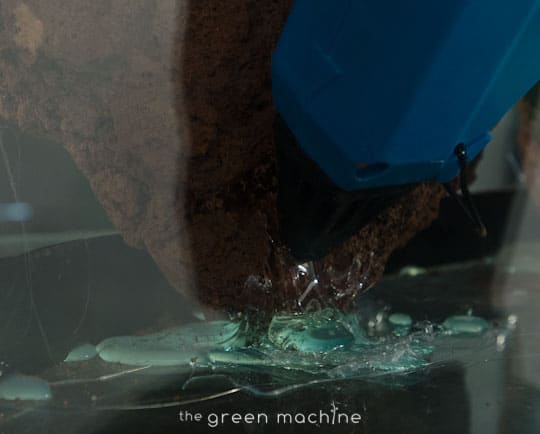
The stones were glued to the bottom of the aquarium to prevent them from falling forwards under the weight of the aquascape. This was a very important step, and a large amount of glue was used. Don’t worry about the glue, as this can be removed from the aquarium with gentle heat.
01.46
Usually the substrate is added before the stones, but for this unique design James added the stones first, as they were needed to form a sort of wall to shore up the substrate, which he wanted to be very high at the back of the layout. This was a technically tricky aquascape to design and create, not least because it has never been done before. TGM Tropical Lava Rock was used because it is lightweight and porous.
02.39
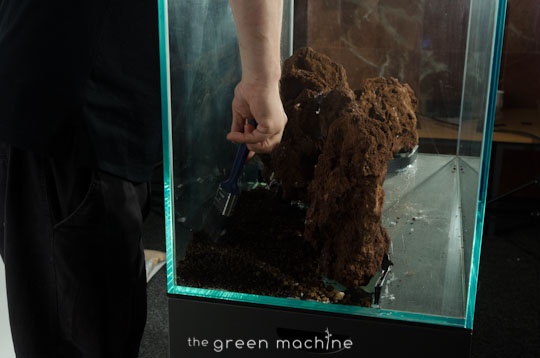
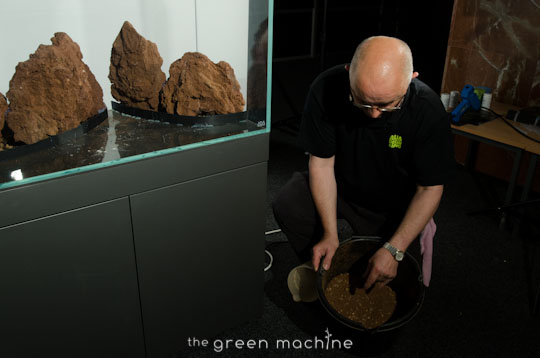
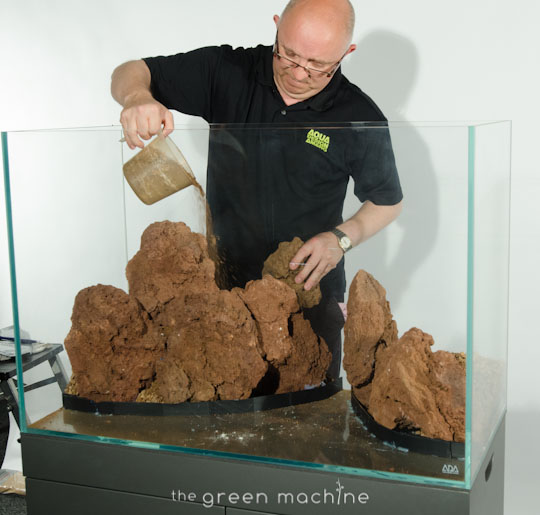
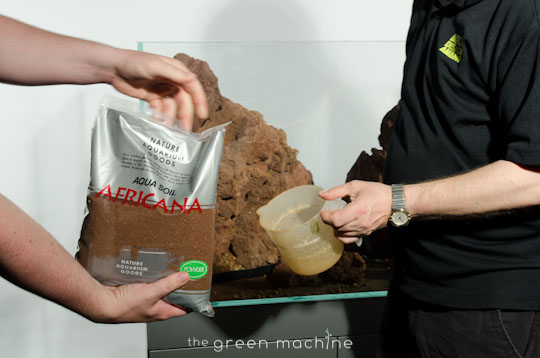
Now that the first layer of stones is complete, the substrate additives are put in. These are not essential, but James always uses them in display pieces because they need to be perfect.
02.49
It had previously been thought that it was not possible to bank substrate up so highly, since the weight causes the substrate to compact, which is disastrous for a planted aquarium because the substrate can become anaerobic and create pockets of hydrogen sulphide which are toxic for fish and plants.
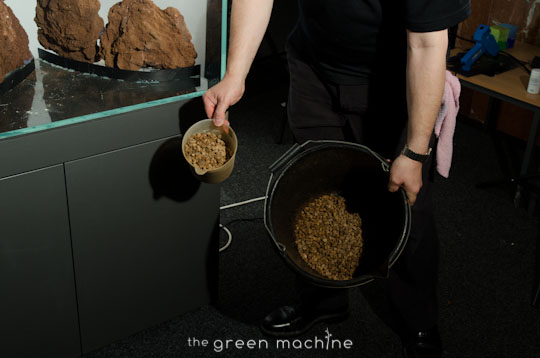
In order to combat this, James mixed ADA Power Sand Special L with ADA Aqua Soil Africana granules in a 50:50 ratio. This ensured that the substrate did not compact and become anaerobic, and allowed him to pioneer this new style of aquascaping.
James used a variety of sizes of Power Sand in order to create the most natural environment.
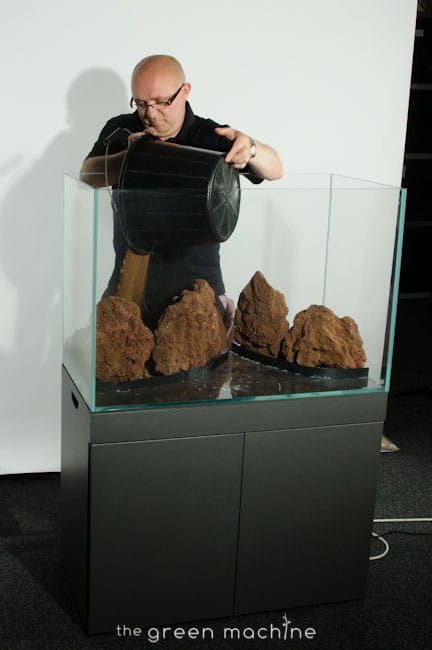
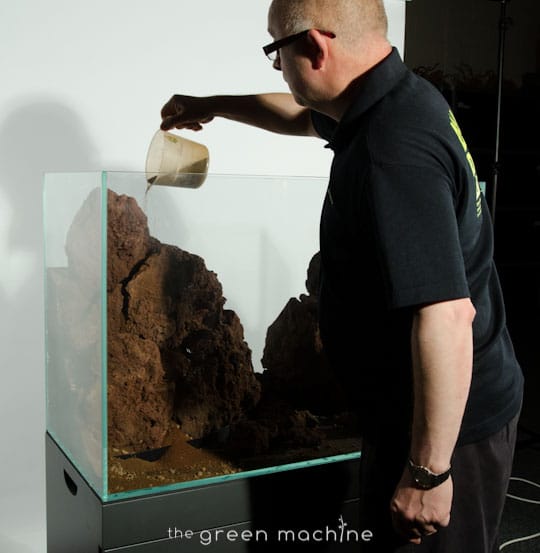
First, a layer of power sand was added to the bottom of the aquarium. Then the substrate and more power sand were mixed in buckets and added to the aquarium. This technique allowed James to bank the substrate up almost to the top of the 60 centimetre aquarium without any problems, which in turn allowed him to achieve his overall vision of using the full vertical space without having to use any wood, which is the traditional technique to make use of such extreme vertical space.
The TGM Tropical Lava rock also helped because it is porous and therefore a fantastic material for beneficial bacteria to colonise, which help with filtration and preventing anaerobic conditions.
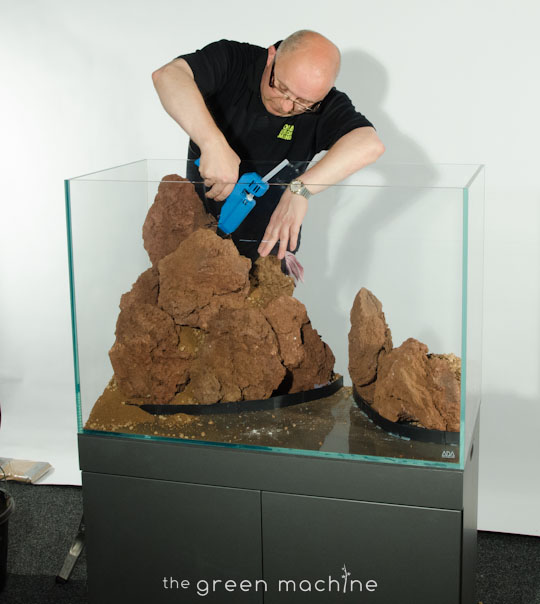
04.16
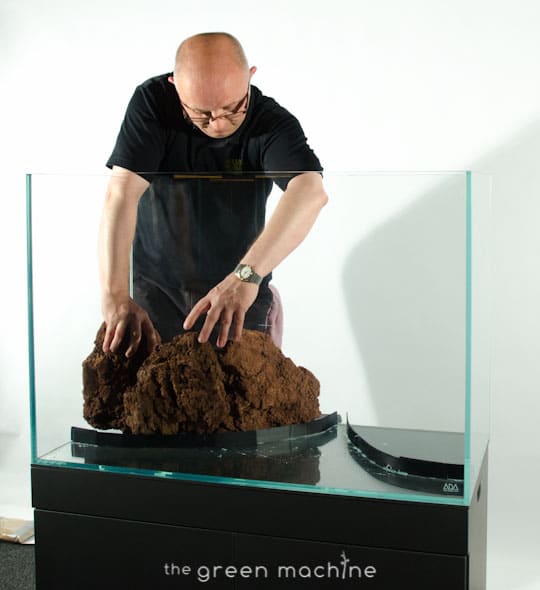
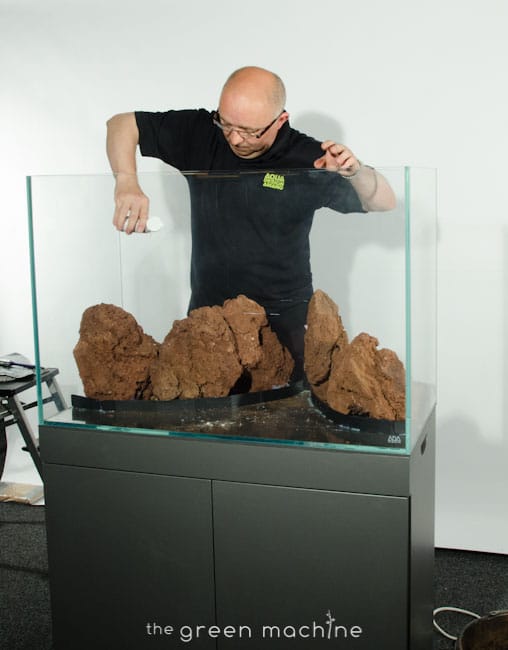
The second layer of stones is now added, on top of the substrate. The stones are put together a bit like building a wall, with the gaps in the wall to be covered by plants later. The second stones are glued to the first, and more substrate mixed with power sand is added in the gaps, so that a solid wall is created that will be able to take the weight of the shored up substrate.
TGM Substrate Supports were an essential element of this layout. These were developed by James when he was creating his work entitled ‘Tributary’ to allow the substrate to be shored up to a great height. Traditionally stones were used, but these were costly and interfered with the growth of the plant roots.
05.03
Here, you can see what happens when substrate is banked up and not yet supported: it simply surrenders to the forces of gravity and rolls forwards. That is why the height of this aquascape is so impressive from a technical point of view, as well as an artistic one.
05.22
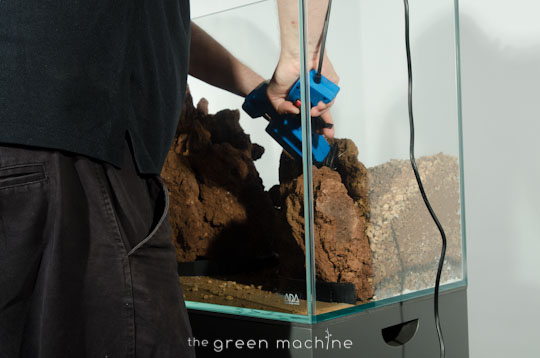
More substrate mix is now added to the second layer and even more TGM Substrate Supports are added. This layout needed deep Substrate Supports because it was banked up so highly, James described how this was the most technically challenging, small aquascape he has done so far, but the end result was well worth it! You can see how the stone work is holding the substrate in place, so that the only place that Substrate Supports were really needed was the edges.
06.08
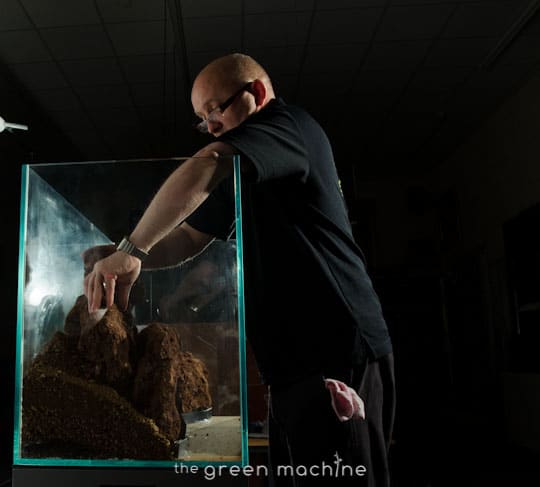
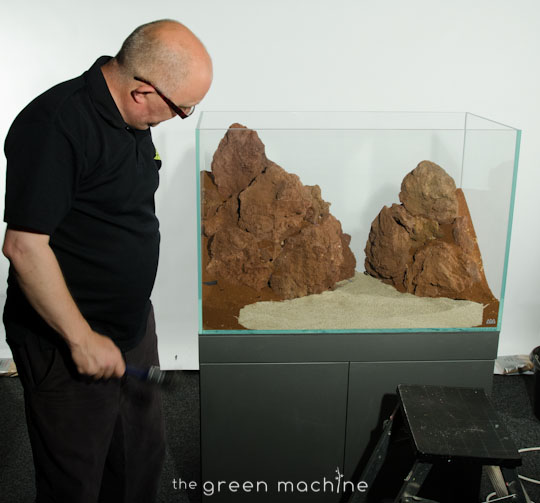
The third layer of stones is now glued into place. A good tip is to crumble some lava rock and dust it over any visible glue when the glue is still wet, so that it becomes invisible. Lava rock can be easily broken into smaller parts or crumbled up, but always make sure you wear goggles to protect your eyes.
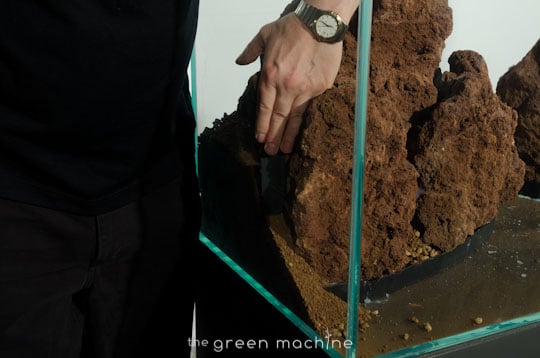
07.00
A larger Substrate Support was added on the left to allow an area at the front to be filled with ADA Aqua Soil Africana Powder for planting. This was secured, with Substrate Supports, which will not be visible once the sand is added in the front area. It is particularly important to shore up the substrate properly when it is near to decorative sand, because if the substrate spills over onto the sand it is unsightly.
07.49
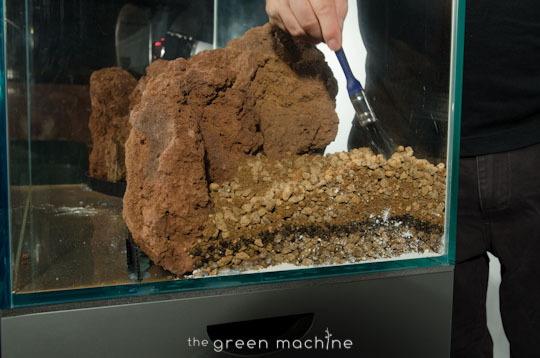
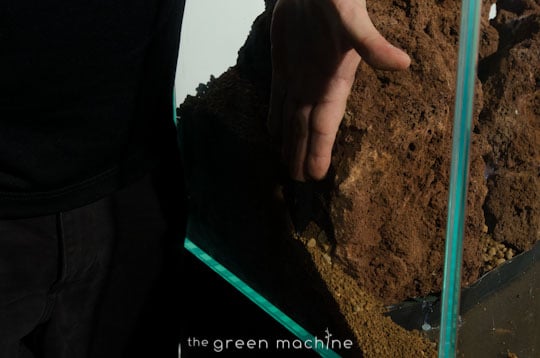
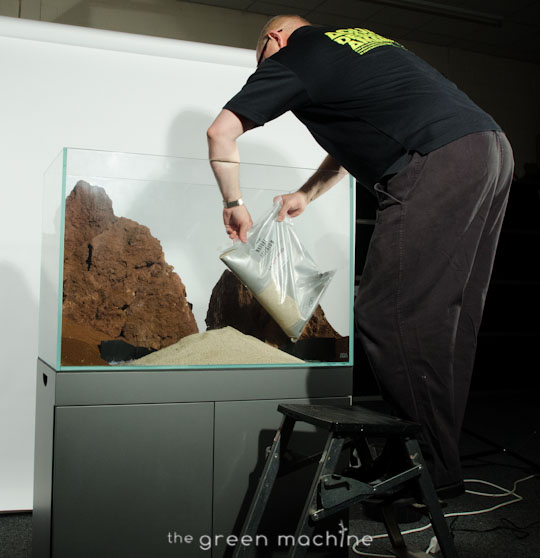
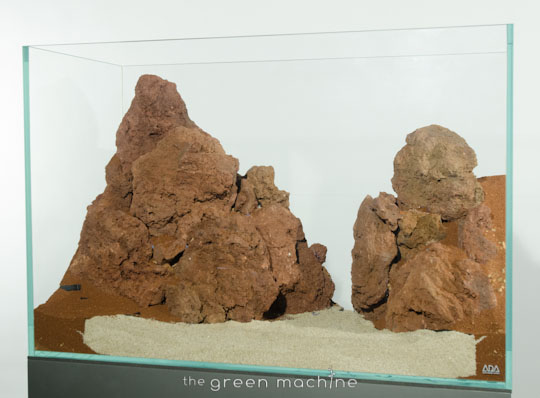
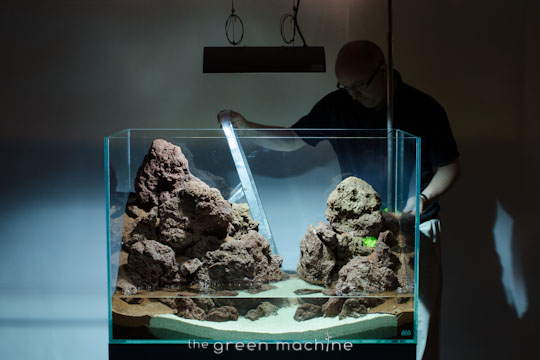
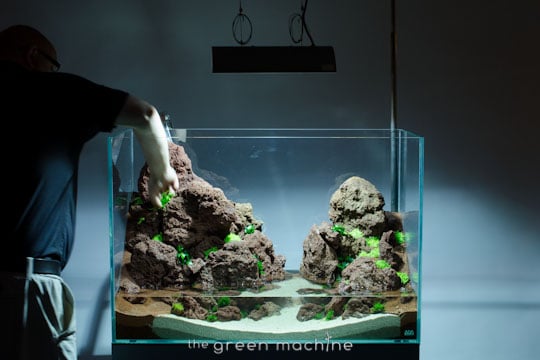
Light, white sand is now added to the layout. This was chosen to create a stark contrast with the colour of the stone, and to add an element of light to the design. James chose to use the NA Green Bulb to emphasis the green plants he wanted to use, and knew that this would reflect beautifully on the light sand (08.10) the sand is smoothed with a paint brush, and levelled up to the height of the Substrate Supports.
Some smaller stones are then added to create a sense of natural chaos and intricacy that replicates the natural world
09.01
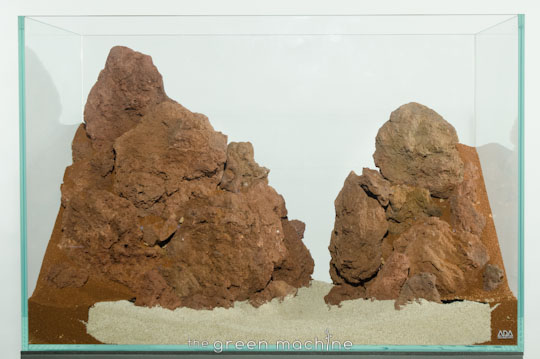
Here you can see how well James’ new technique has worked: the substrate has been successfully banked up to a height of over 55 centimetres, but, as you can see from the texture of the substrate mix, it is well aerated and not likely to become compacted. James explains that experimenting with new techniques and methods is always a little risky, but if you apply your knowledge and a little common sense, anything can be achieved with a little innovative thinking!
09.27
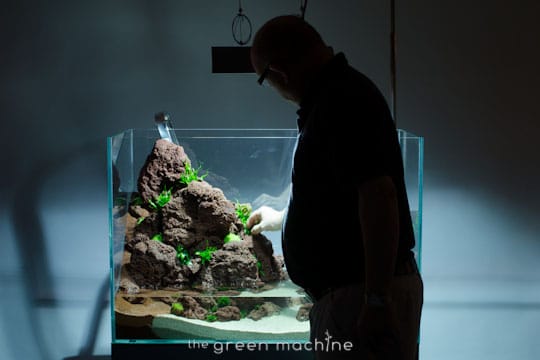
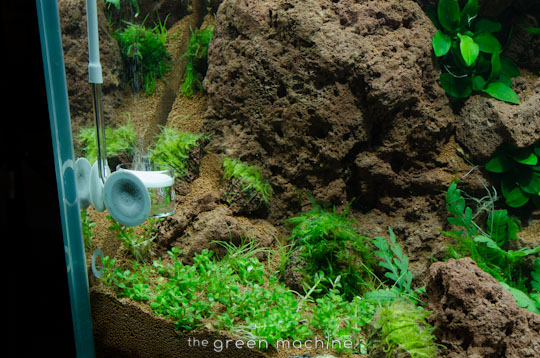
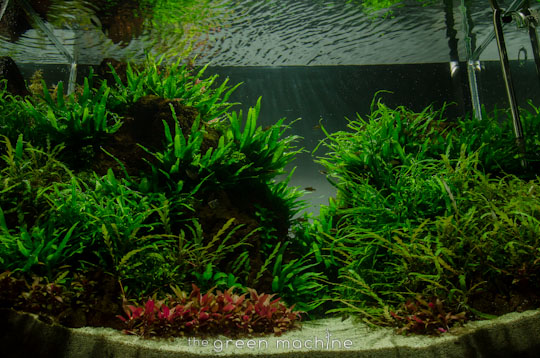
Utricularia gramnifolia is added to the layout. This is a difficult plant that is naturally insectivorous so it does not respond well to fertilisers. James planted it into the seams, between the rocks, to create the sense of a continual cliff face, or canyon. As you can see, a good pair of aquascaping pinsettes is vital for precision planting. (09.57)
10.03
Vesicularia dubyana ‘Christmas’ moss that has been bound onto small stones with Riccia Line is now added to the layout, to create a mossy effect. Binding the moss onto small stones is a simple and effective method for getting the moss started, which will eventually seed onto the surrounding stones in the layout and spread. Now the full height of the layout is beginning to show its dramatic impact.
10.32
Java fern sp mini is added. This is a small java fern that will create a wild, jungle look. The mini was used because James didn’t want the plants to grow too large as this would dwarf the rockwork and spoil the sense of scale. Java ferns are the focal plant in this scape: if Microsorum pteropus had been used, the sense of scale would have been lost as the leaves are too broad.
10.48
James entitled this work ‘Altitude’ because his vision for it was to create a vast, tall, unforgiving landscape of rock, interspersed with lush green plants. His inspiration came not only from nature, but also from the marine aquariums which use rock walls as a focal point.
In order to achieve this, he needed to adapt current thinking and techniques, and in doing that he demonstrates that in the world of the Nature Aquarium anything is possible if you think outside the box.
This aquascape took some time to conceptualise and create, and adapting the techniques and traditional methods was very challenging, but definitely worth while! James added that after working with shallow tanks, this tall piece was the obvious next choice.
The texture and structure of this layout creates very interesting light formations: some areas are completely dark whilst other parts very light – just like in a real canyon or cliff face.
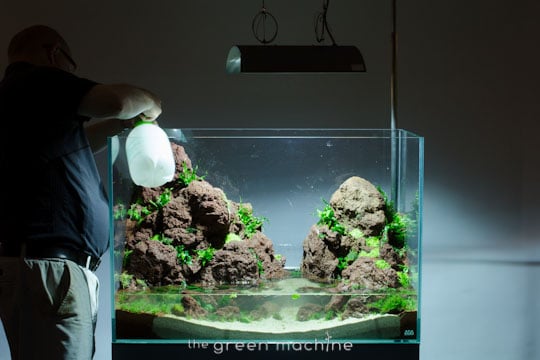
12.22
It was important when creating this layout to mist the plants from time to time to stop them from drying out and dying.
12.27
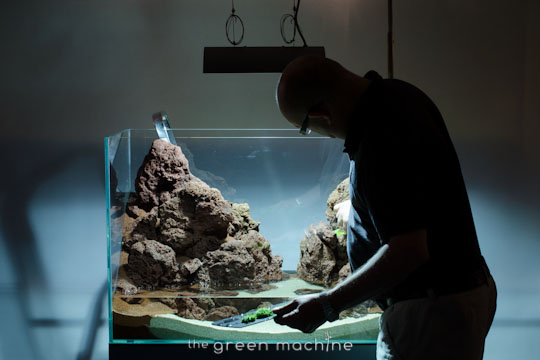
Hydrocotyle verticillata is added.
When plating aquatic plants, good preparation is vital. Plants that are prepared badly have lower survival rates, whereas healthy plants that are prepared well will thrive. Make sure you purchase your plants from a specialist retailer, who should be able to give you detailed, specific advice about planting preparation. You can also watch our plant preparation videos online.
12.52
Next, some Hygrophila pinnatifida is added. The beauty of this plant, for this layout, is that it sends out roots that cling onto stones brilliantly, so it was a perfect choice, as it will eventually climb over the face of the rocks. It also develops deep russet colours that are simply stunning.
13.30
Ammania bonsai is added next. Be careful with this plant as it becomes overgrown quite easily.
Working with tall aquariums can be quite a challenge so it always useful to have a small stepladder to hand.
14.00
Rotala rotundifolia is added. This is planted into the substrate at the back of the layout to add some delicate red hues to the back, breaking up the green, contrasting with it and adding a sense of intricacy to the layout.
When creating your layout it is important to consider how the plants will be when they are fully grown, as this will allow you to create a natural aquascape that is easy to maintain. Any good retailer should be able to assist you in selecting plants that will complement each other and help you achieve your artistic vision. As you experiment with more aquascapes, use different plants, so that your understanding grows, as this will help you to create stunning aquascapes…but don’t worry about perfection too much to start with….have fun and you will soon learn the tricks of the trade! (14.50)
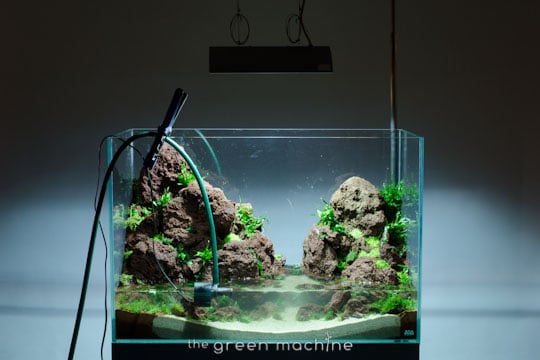
15-10
A maxi jet pump is used to fill the tank without disturbing or damaging the layout. If the water was simply poured into the layout, it could displace the plants, substrate or rocks.
Layouts are particularly delicate when first made because the plant roots have not become established yet and these help to hold the layout together.
Another method is to place a hose onto a plate, or into a jug, to gently displace the water as it enters the layout. When filling your aquarium, make sure you are present to keep an eye on it just in case there are any mishaps. (15.38)
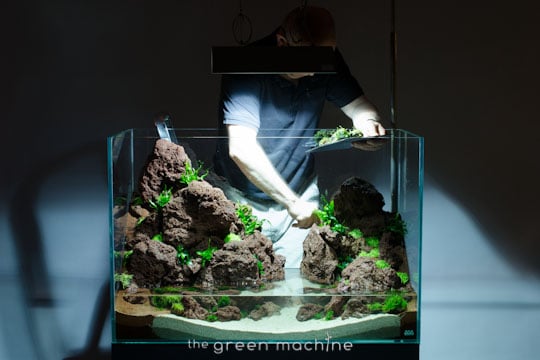
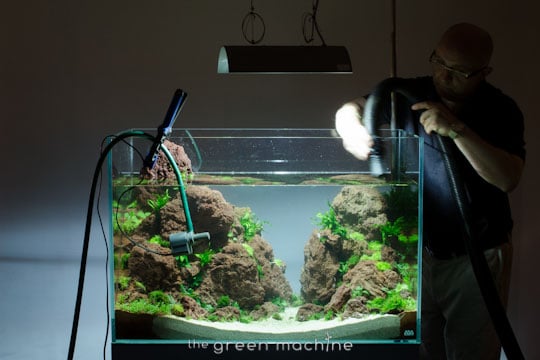
A wet dry vac is used to remove debris from the surface and some final plants are added to the layout.
Now that the layout is coming together you can see the dramatic effect of the use of height, and the interesting plays of light and dark.
15.54
Any loose particles of Aqua Soil are siphoned off the sand, to ensure that the sand remains a bright white area, free of aqua soil.
16.04
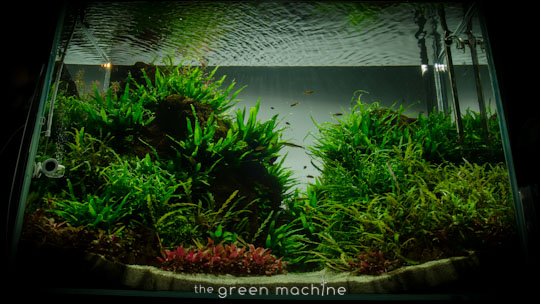
The layout is now complete. James chose to use a Metal Power Pipe as an Outflow to create a strong flow on the water’s surface because he wanted to create a layout that played with light: that is why he chose the NA Green Bulb and the white sand – to emphasise the play of light under water. You can see the effect of this here – by the way the light dapples across the bottom of the layout.
16.25
TGM Light Diffusing Aquarium Backing is now placed on the aquarium. This is simple to apply and can be removed easily, without causing any effect to the aquarium. It creates a neutral background so that nothing detracts from the impact of the aquascape.
17.58
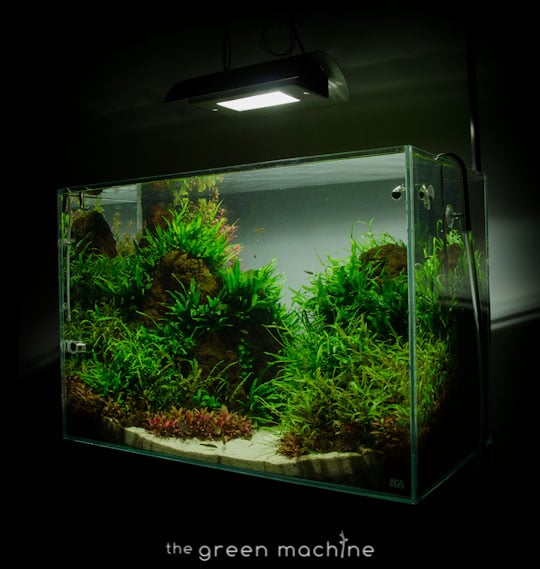
You can now see the full scale of this layout: with the new techniques developed and used by James, the 60 centimetre height allows for original, exciting and innovative designs to be achieved.
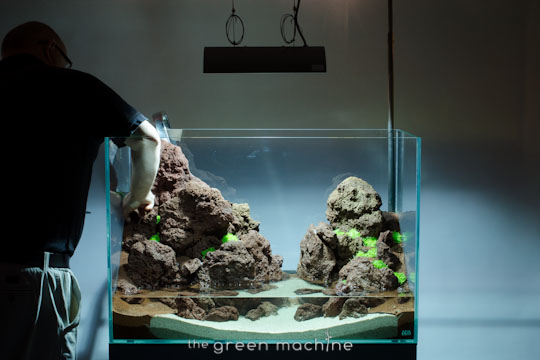
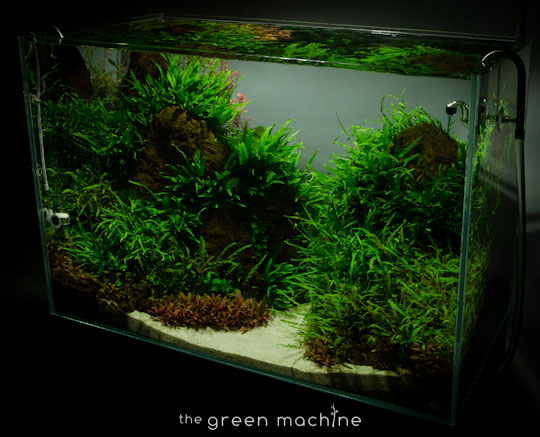
18.10
The plants chosen by James were very slow growing plants, but here you can see how beautiful they are. Some Alternathera reinicki sp mini has been added to introduce an element of red to the front of the layout, and add a dramatic contrast to the green.
18.28
Notice how the Hygrophila pinnatifida has grown onto the stones and the java fern sp mini have developed beautiful but narrow leaves that maintain a sense of scale in the layout.
Some Microsorum trident has also been added at the back right of the layout, behind the stones. This is a new plant that has a very delicate, thin leaf shape that will no doubt prove to be an extremely popular plant in future.
You can just see the Rotala rotundifolia peeping out above the green at the back left of the layout, adding an element of delicate light and colour to the background.
Notice how the light from the NA Green Bulb plays on the floor of the layout, dappled by the strong flow of the outlet, and reflected by the bright white sand. This creates an interesting contrast between the very dark areas created by the cliff face of the rock, which results in an interesting, dramatic and intricate aquascape.
James chose to add around 30 Danio margaritatus – Galaxy Rasbora, 7 Sphaerichthys vaillanti – Vaillant’s Chocolate Gourami, some Crossocheilus siamensis – Siamese Flying Fox and some Caridina sp. – Crystal red shrimp to this layout. You can see how healthy and happy the fish are: because the Nature Aquarium emulates the natural environment, it is perfect for fish – in fact, they rarely need any medication when they are kept in a healthy Nature Aquarium. Small fish are perfect for Nature Aquariums because they maintain a sense of scale in the layout.
You can see the plants pearling: releasing the vital oxygen into the water that is created by the process of photosynthesis, and vitally needed by the fish.
The health of the plants and fish is a testament to the success of the new techniques developed by James. This was filmed nine months after planting and you can clearly see that there have been no problems with compaction or filtration, demonstrating the success of his new techniques. It is also a true testament to the skills of the maintenance team at The Green Machine.
This aquascape demonstrates what can be achieved when you think outside the box and actively apply your technical knowledge to achieve your artistic vision: this layout has pushed the boundaries of traditional aquascaping and successfully challenged what was previously thought impossible, and, in the process, created an amazing, awe inspiring and awesome work of art.